Sunday, January 27, 2013

Phew….we are moved!

Finally, the move is over and we are in the process of unpacking.  I think we are close to 95% done now….just the seasonal stuff to go through like Christmas.  I will do that when the time comes.  I think we have taken 15 boxes to the thrift store!!!
Yesterday and today I have been unpacking my craft room.  I have an idea of what I want it to look like but, I am not sure if it will work or not. 
In the meantime….I just unpacked boxes and shoved them onto shelving units to clear the floor up.  I need to put my Best Craft Organizer together (I bought the triple unit) before I can start to really put things away.  You wanted to see pictures so….here they are:


Doorway is to the left…first pile is my wire jewelry toolbox topped with my sewing toolbox and the box of computer stuff on top (I badly need to format my computer).  Storage shelf top to bottom:  Un-mounted stamps, bits and pieces, stamp and punch sets.  Next shelf holds die cuts, Nestabilities etc.  Next shelf holds ribbons, Stickles and stuff.  Bottom shelf holds photo box lights embossing folders, embossing powder etc.  Next to the shelves is an old Ikea hutch that is holding stuff,  most of my 8.5x11 paper, punches, magazines, Big Shot etc. 

Next wall with the window:  My filing cabinet is holding projects ideas, card ideas, tutorials etc.  I always print them off and down the road I am going to sort them into binders.  I have part of my wire rack sitting there holding my 12x12 pads of paper temporarily, my scanner with my Gazelle sitting on top (for enquiring minds….my cat loves to visit me and sit on my scanner so my hubby made a wooden cover covered in carpet so he will not hurt it).  Under the window is my craft desk (not a keeper…new one coming).  The rolling cart under the desk holds 12x12 paper and 8.5x11 paper until the new storage system is built.
 
 Next to the desk is my printer stand.  On the next wall is my computer desk (also not a keeper).  The shelves hold most of my seasonal stamps and punches, spare ribbon rolls, more punches and stamps.  Behind the two wooden cassette racks that hold my ink pads is my Copic air gun, box with all my hand made paper and rolls of background paper, all my glitter and my dremel tool set. 

Last wall is the closet.  Behind the door on the left is my Pergamano, needlepoint and basket of scrap paper.  The closet holds most of my beading supplies.  It is just a mess of beads in boxes and other miscellaneous stuff.  My copics are on the right shelf.   The two pictures to the right of the closet are from a class I took at Be Creative…..Thomas Kincaide stamps, stampscapes, Marvy inks and scratch board.  I had so much fun and love them so much I framed them for my wall.


This is it….I can’t believe I have so much stuff.  Don’t ask me to make anything as I really have no idea where to find anything!  Hubby is vacuuming the carpet and we are going to try to put the Best Craft Storage unit together.  Should be interesting….actually, through the whole move and unpacking and organizing we only had one fight.  For anyone who knows us….that in itself is a miracle!!!

Friday, November 9, 2012

We are homeless!!!

Actually, that should be HURRAY we finally sold the house.  Now we have to start shopping for a new one.  It has been a long 6-1/2 months trying to sell this place.  But, it is bitter sweet....we move to where we want to be and our daughter and two grandchildren move away from there at the same time.  Oh well....we will be an hour closer to their new place so...I guess it is not that bad.

Friday, October 26, 2012

Is this really crafting????


Just wondering….I mean…I know die cutting, stamping (hand or digital) etc. count as crafting a card but, what about using photographs?  I guess some could say that this does not make a hand made card (crafted) but, I totally disagree. 
So…I think these are awesome and I loved working with the photograph I found on the internet because it was exactly what I was looking for for these cards!

 
The colors are so rich and perfectly compliment each other.  I even found a sentiment that suited the image perfectly.  I love them!
I follow Gina K. Designs and her Stamp TV blog.  When she showed a video of “soot stamping” I had to run out and buy a candle and stamps.  This is soooo much fun and you really, really have to try it….just Google “soot stamping”…it has been out there for quite awhile.

 
Granddaughter is too young this year (only 6 months) but, the two grandsons are just at the right age (3 and 2).  This card is so much fun to make.  I mounted the ghost on a wobble spring and they are going to just love them!

 
I saw this pumpkin on Pinterest and I just had to make one.  Crap…my Tim Holtz rosette dies are packed!  What do you mean I have to do them from scratch?  Out comes the score board and after making six of them…my hands were really sore from creasing.  I needed to add some shading and Distress Inks are perfect for this.  I love, love, love them…and…the neighbor had a vine hanging on our side of the fence that was perfect for sitting one on for photos!


IMHO…crafting is crafting is crafting…no matter what your source materials are.  As long as you put it together yourself with love…it is crafting!
Happy Hallowe’en!!!

More Babies…

I Finally, I know she is 6-months old but…I finally got “Congratulations on your birth” for my granddaughter.  Blame it on my craft supplies being packed…blame it on constantly keeping this house staged….
I was sitting having my usual “coffee and cookies” at Be Creative with the coffee club girls and Barb brought in her acetate bow-fronted cards and I fell in love.  I mean…this is totally cased from her card…she even emailed me pics to help me…what are friends for!
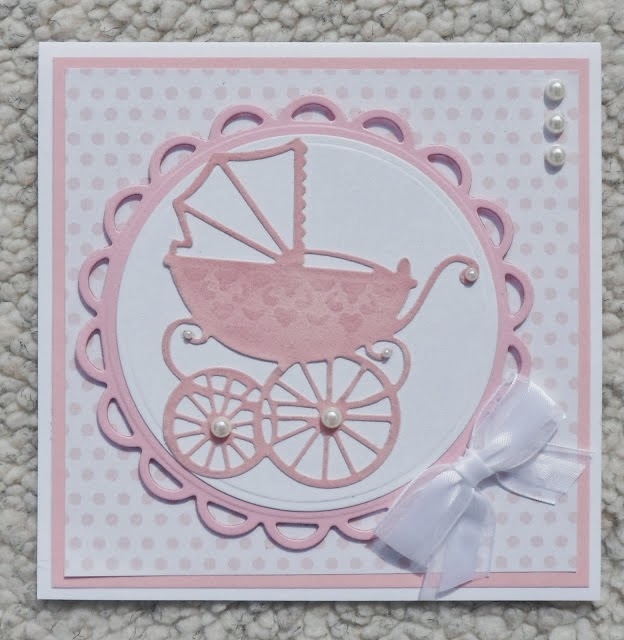
I just love this Marianne Creatables Baby set and I was saving it for just this occasion.  I broke open my stash of pink velvet, placed double-sided Be Creative tape on the velvet and the die cut  out like butter.  It only cut through the velvet and the glue…leaving the backing intact and turned the die-cuts into stickers….wicked!


The bow-front card is one of the free templates when you subscribe to Card Making World.  This website is full of so much information and free templates one can spend days there.  Anyway, this card is almost 1” thick and it required a box…thankfully, the template was with the card instructions.

Once you get the hang of it…it is really quite easy to make them and they look incredible!

 
I wanted to have an actual card and not the acetate standing by itself so, I added a piece to the back.  I carried the chain Elizabeth Craft Designs peel-off to the inside and it was perfect to cover where the card stock was added.
Baby Acetate - Standing

You just have to try this one!

Tuesday, October 2, 2012

VUNDABAR!!!!

I hate…hate…hate creating blog entries in Blogger.  Pictures don’t load properly and I can never get them to format correctly for me. 

I got fed up and did some Googling and found out about Window Live Writer.  I just used it to create my blog entry and pictures went where I wanted them, I could resize them…one button and it posts automatically…wicked!  Now I just need to figure out font defaults and I am a happy camper.

Birthdays and babies…

Finally got a moment to make some cards.  My daughter had her birthday and she loves butterflies.  I saw this card and just had to make it.


While I was working on it I noticed I had duplicate embossing folders and I was missing one.  I contacted Provocraft and they did not send me the missing folder....they sent me a brand new set!  How's that for service!!!
It's baby time around here and I love, love making baby gifts.  When I spotted the die from Marianne Creatables I just knew I had to have it!  Our real estate agent is in the process of having another baby girl and this card is perfect for them.


My massage therapist is having her first child and I wanted to make some things special for her. 
Tissue box!


I read on Becca Freeken’s blog (Amazing Paper Grace) and how she altered a picture frame…I had to attempt it my way…I am lousy at stamping but, I am wonderful at creating digital sentiments!


Then the baby blocks I love creating for babies…. 


Of course, I had to make a card too!


I love, love, love this card!  I guess it is on to Hallowe’en and Christmas cards next.
Have a great day!

Friday, August 17, 2012

I did it....


Okay, first of all...I guess there is a silver lining to not selling our house as soon as we thought....we haven't been home to pack anyway.  We have been off camping as much as we can (I know DS..you don't think traveling in a 34 foot motor home is camping)!

 I did it...I made some cards...can you believe it?  I actually found time and supplies to whip up a couple of cards.  During my blog surfing I save pictures of cards I like in order to case them if I get a chance or need an idea or two.  This time I had three ideas (okay cases!!!).

 I saw this card and I just had to buy the stamp and color it up for a friend of ours.


This one was for one of our daughter-in-law's (we have two darlings) birthday.  We managed to drive up for the night so we could spend the day and evening with her, our son and grandson.  I'm In Haven has some really awesome cards and with this one I packed my punches but, I did find some flower embellishments I could use.  Okay...not colors I liked then, I remembered I could change the colors with Copic markers...presto!  I am learning to decorate the inside of my cards and I still have a few border punches not packed.  I really, really can't afford all the sentiment stamps out there and I do like creating or trying to duplicate them with free fonts and my graphic programs.  I prefer digital as the images are crisp and clean.

Our two grandsons have birthdays two weeks apart...one is turning three and the other is turning 2.
I spotted this on Deneen's website and immediately went to Mo's Digital Pencil and purchased the little guy image...he is called "Sumpins Wrong"...isn't he delightful!  I couldn't wait to color him up and make my first step card for the grandson who is turning 3.

I was having problems with the dresser and after pulling my hair out for a couple of hours I had an "AHA" moment...Tim Holtz Picket Fence dauber!  I masked off the area for the dresser and created the aged look and again on the pieces used for the drawers.  The drawer knobs are pop dots but, as I find the cover is glossy on the underside and won't stick permanently, I punched some circles and placed them on top of the sticky pads.  The dresser leg shape is a Nestability
labels die.

The inside is computer generated right to the hand prints from the internet.


The youngest grandson is turning 2 and...a huge fan of tractors. I spotted this one and it was perfect...she even had links to the coloring pages website.


Our other daughter-in-law is having a birthday at the end of the month and I had this card saved for just such an occasion.  As I was mailing it I had to alter the size of the card a bit and made it a 5.75 x 5.75 square.  I had some white scraps with black velvet swirls on them and it was perfect for the butterfly (Cheery Lynn die), again with the digital sentiment.  I "googled" butterfly images until I found one that was
swirly like the front.


You know...Blogger is not my favorite program at the moment...it is a real, real pain in the butt to insert photos and have them appear where I want in my blog posting.

Have a great day!